3.3 Model Training
Traditionally, we split data into training and validation sets in 80:20 ratio. Before we start the model training, make sure you have ingested data into Momentum and created training and validation sets. If you have not done so, here are links that will helps you to prepare the data.
How to create training and test sets using Transformer
How to create a data processing pipeline
To explain the process of training a model, we will use deep learning or artificial neural network based multi-layer perceptron classifier that predicts if a machine will fail given its operating condition. We have ingested the AI4I 2020 Predictive Maintenance Dataset (https://archive.ics.uci.edu/ml/datasets/AI4I+2020+Predictive+Maintenance+Dataset), and created 80% training and 20% test sets.
To train a model, e.g., multi-layer perceptron classifier, here are the steps:
- Expand “ML Model” from under the “Machine Learning” section of the left side menu panel, and click “ML Home” to launch the ML home page.
- Click “Create New Model”.
- From the “Supervised Learning: Classification” drop down, select “Deep Learning/ Artificial Neural Network/Multilayer Perceptron Classifier.
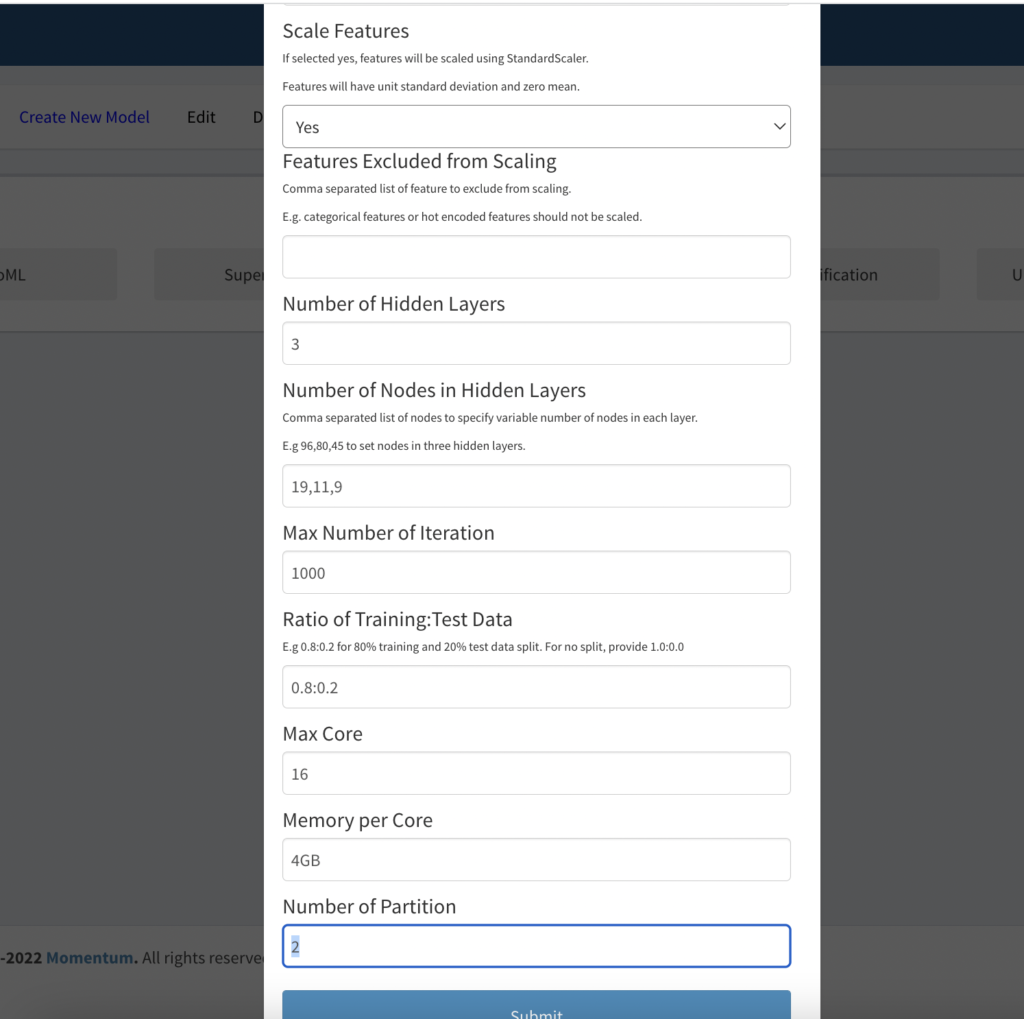
- Fill out the form as described below, and shown in Figure 3.1a and 3.1b for example:
- Model Name: give a meaningful name to identify this model, for example Machine_Failure_Prediction_Model
- Give a version number, just in case you need to build multiple versions of this model.
- In the Feature Field text area, supply a comma separated list of all features you want the model to learn from. In this example, we are using the following features:
Air_temperature,Process_temperature,Rotational_speed,Torque,Tool_wear_in_min
Listing 3.1: Feature list
- Categorical/Non-numerical fields: comma separated list of all features that are not numeric. We will not have such field, so we will leave it empty.
- OneHot Encodable Field: Categorical and non-numeric fields should be encoded. Leave it empty in this case.
- Target Field that needs to be predicted. Machine_failure is our target field.
- Number of Classes: The machine failure data has only two classes – 0 means no failure and 1 means failure. We will fill 2 in this field.
- Scale Features: It is generally a good idea to scale the features, we will select “yes”.
- Feature excluded from scaling: We will leave this field empty.
- Number of hidden layers: This is to configure the neural network. We will start with 3 hidden layers.
- Number of nodes in each hidden layer: We will use varying number of nodes in each layer. For example, 19,11,9 to indicate we want to use 19 nodes in the first hidden layer, 11 in the second and 9 in the last hidden layer. If you want to use the same number of neurons in each hidden layer, use a single number. For example, if we enter 16 in this field, all hidden layers will have 16 neurons.
- Max Number of Iteration: We are starting with 1000. If the algorithm converges before it reaches the max 1000 iterations, the training will automatically stop to avoid unnecessary computation and time.
- Training: Test ratio to split the training data internally into this ratio. We are using 0.8:0.2 for 80% and 20% split.
- Max Core: This is to parallelize the training by using multiple CPU cores of the cluster. We are going to use 16 cores as our dataset is not large. For large dataset, using more or all available CPU cores of the cluster will speed up the training process.
- Memory per Core: For most training 4GB per core should be sufficient but may be increased for a large and complex model.
- The number of partitions is not used at this time and is reserved for the future.

Figure 3.1a: Showing a part of the neural network configuration form.

Figure 3.1b: Showing the remaining part of the neural networks form
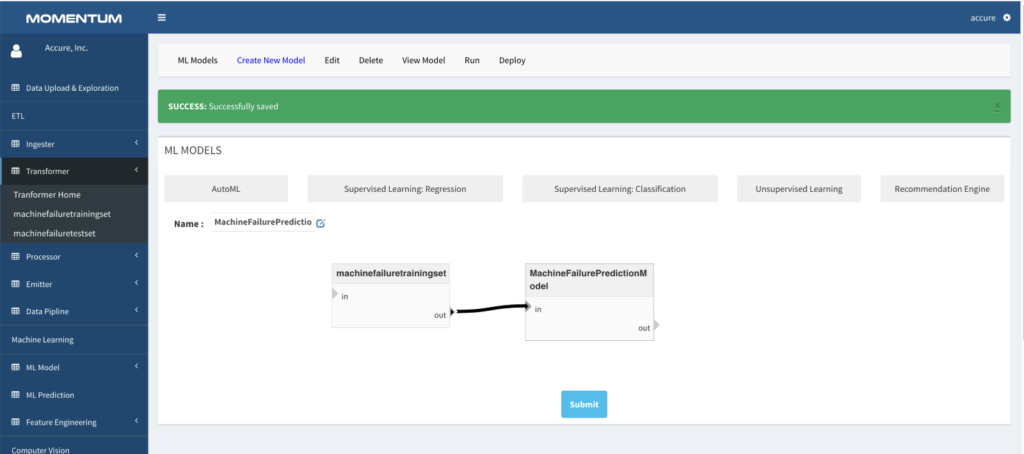
- After submitting the form, a rectangular config widget is created on the main body of the page.
- Expand Transformer from the left menu panel and click on the training set transformer to bring it to the main page.
- Click on the “Out” on the training set rectangle and click on the “In” of the model config rectangle. This will join the training dataset to the model config (shown in Figure 12 below)
- Saving the configuration will take the screen to the ML home page.
- Click “Run” located at the top menu to start the model training.

Figure 3.2: Screen showing model configuration