Documentation
-
Momentum
-
MLOps
-
Impulse EDW
-
- 2.1 Create a Warehouse
- 2.2 Edit Warehouse
- 2.3 Datasources In Warehouse
- 2.4 Ingesting Data Into Tables or Datasources
- 2.4.1 Ingesting From Momentum Data Pipeline
- 2.4.2 Uploading File Using Impulse UI
- 2.4.3 Ingesting From External File/Storage System
- 2.5 Add Data to Existing Tables
- 2.5.1 Update Existing Index
- 2.6 Delete Table Records (Rows)
- 2.7 Delete Tables or Datasources
- 2.8 Monitoring Indexing Tasks
- 2.9 View Datasource Stats
-
Inset BI
- Alerts and Reports
- Connecting to a new database
- Registering a new table
- Creating charts in Explore view
- Manage access to Dashboards
-
- Articles coming soon
-
- Articles coming soon
-
- Articles coming soon
-
- Articles coming soon
-
- Articles coming soon
-
APIs
- Articles coming soon
< All Topics
Print
4.6 Create Role
To create a role:
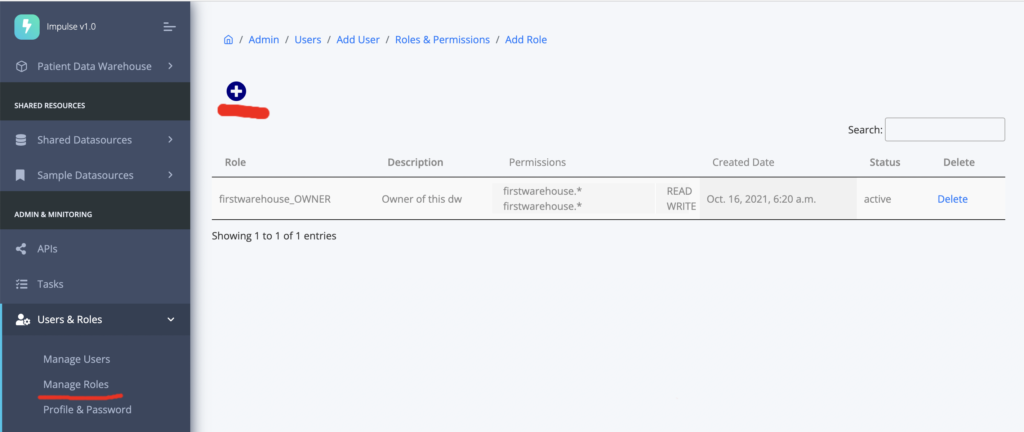
- Expand Users & Roles from the main navigation menu
- Click Manage Role (Figure 3.3a below)
- On the next page click on the plus icon to create a new role
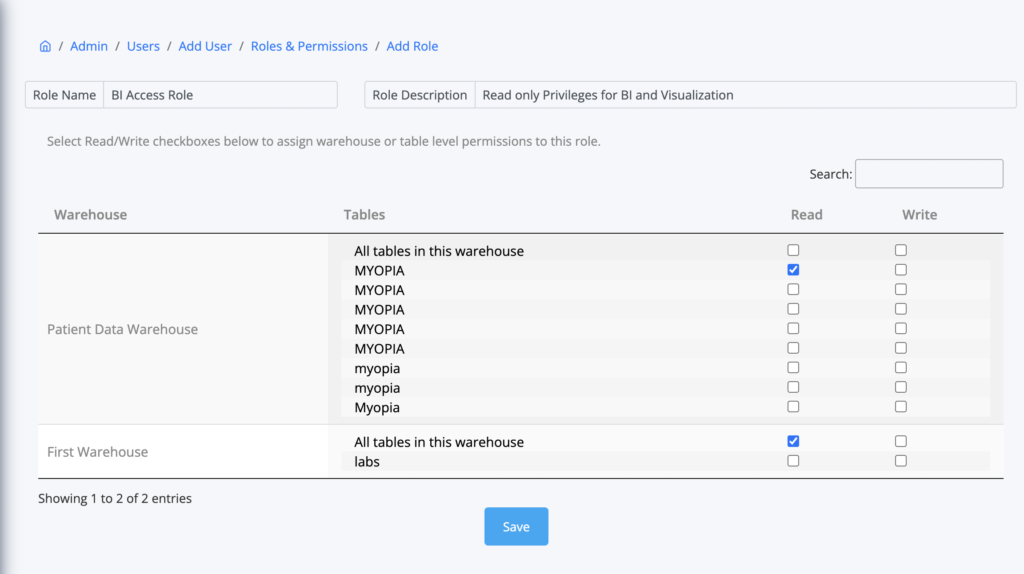
- Fill out the form to provide (Figure 3.3.b):
- Role Name: a short name to identify this role
- Role Description: A descriptive name to indicate its purpose
- Select the Read or/and Write checkboxes corresponding to a warehouse or one or more tables to define the access privilege under this new role.
- Save to create the role.
Note: This role needs to be assigned to one or more users to grant access to resources to those users. Here is the instruction on how to assign roles to users.


Table of Contents