Model Access Management
- Expand Users and Roles from the left menu panel.
- Expand Model Access, and click either Model View or User View
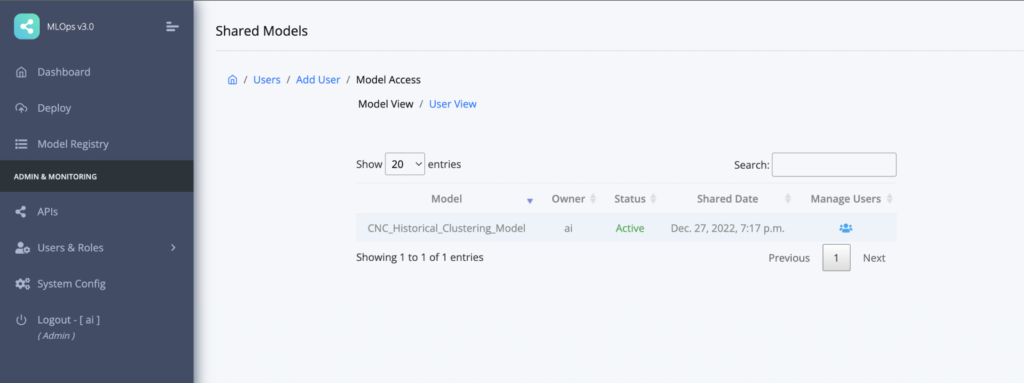
- Model View shows a list of models and users who have access to these models (Figure 4.11a)
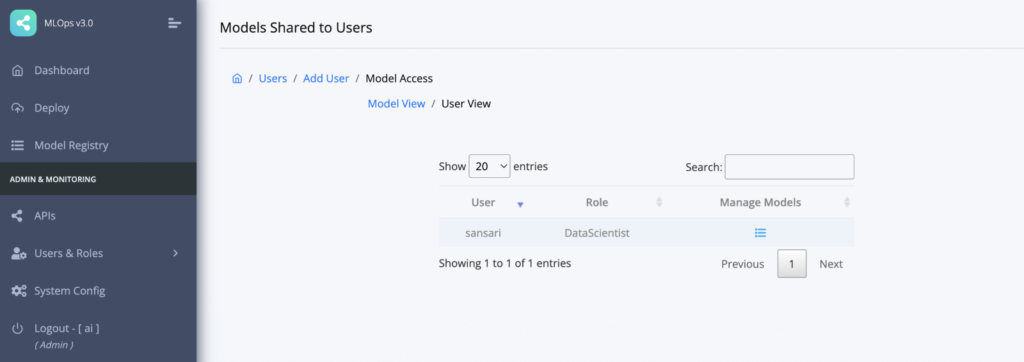
- User View shows a list of users and all the models they have access to (Figure 4.11b)

Figure 4.11a: Model View of the model access

Figure 4.11b: User View of the model access
- As shown in Figure 11.a, click on the icon
corresponding to the model you want to manage the access to.
- On the next modal window, search the user you want to give access to this model.
- Click the
corresponding to the user to grant access to the model.
- To revoke access to the model, click the delete icon corresponding to the user who already have access to this model.
- If you want to manage model access of a specific user, switch to “User View” (as shown in Figure 4.11b).
- Click the icon
corresponding to the user you want to manage the access for.
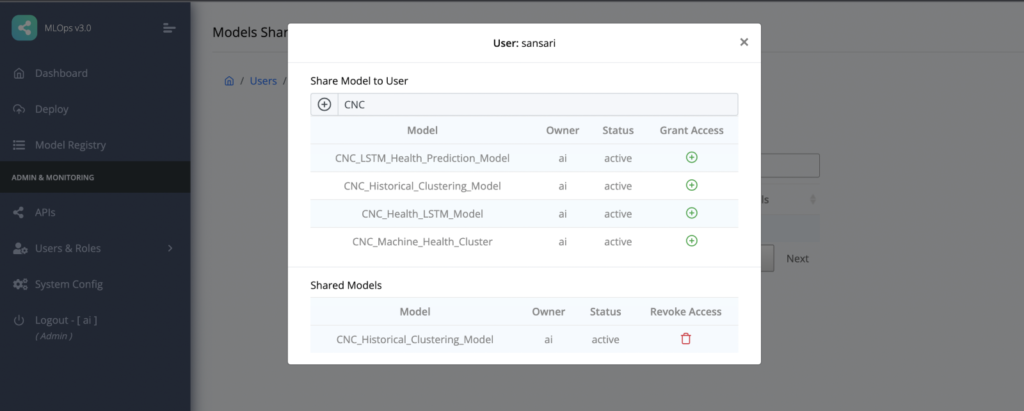
- In the next modal window, search the model you want to grant this user access to and the click on the plus icon.
- If you want to revoke this user’s access to a particular model that this user already have access to, click on the delete icon corresponding to the model. Figure 4.11c shows a screenshot example.

Figure 4.11c: User View showing all models a specific user access to and models that can be added to grant this user access to.